If you are thinking of building the Alex Rice contact mic preamp, stop it and get some help. This is the help. It is a low-noise phantom-powered contact mic preamplifier with adjustable gain. It is similar to the
Marshmallow DIY Kit, but it is phantom-powered so no external battery or power is needed. It is the exact same preamplifier as is in
Metal Marshmallow Pro but in a handy DIY form factor. Solder a piezo disc to it and connect it to your audio interface with an XLR cable and voila, you have the best contact mic evvvrrr!
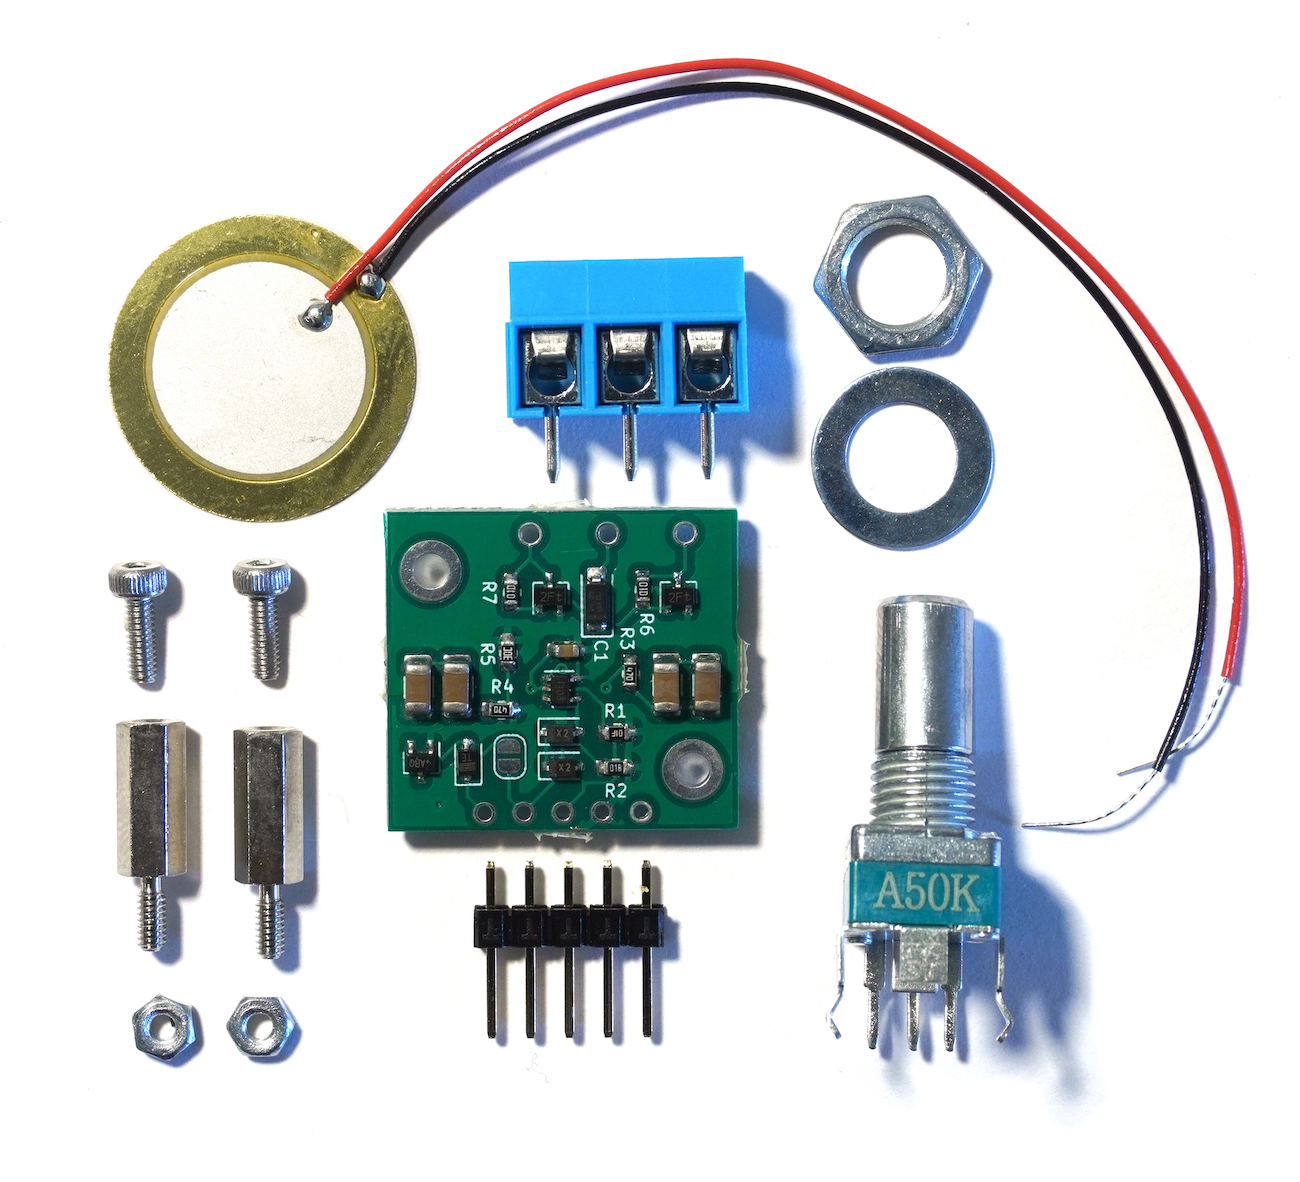
Included
- Marshmallow DIY Phantom Piezo Preamp
- 20mm Piezo Disc
- 5-Pin Header
- 3-position terminal block
- Standoffs
- 50k Potentiometer
Pin Description
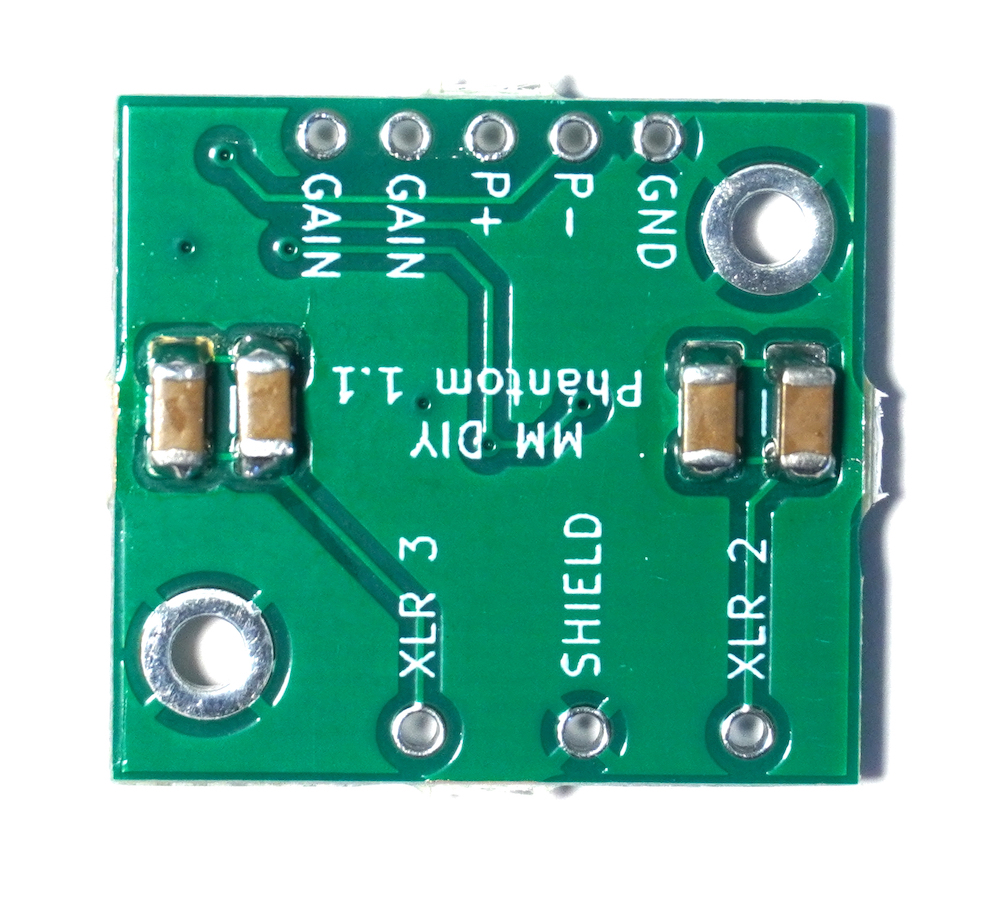
- p+ Connection for the positive lead of a piezo disc. By convention the inner crystalline part of the disc is considered as positive.
- p- Connection for the negative lead of a piezo disc. By convention the outer brass part of the disc is considered as negative.
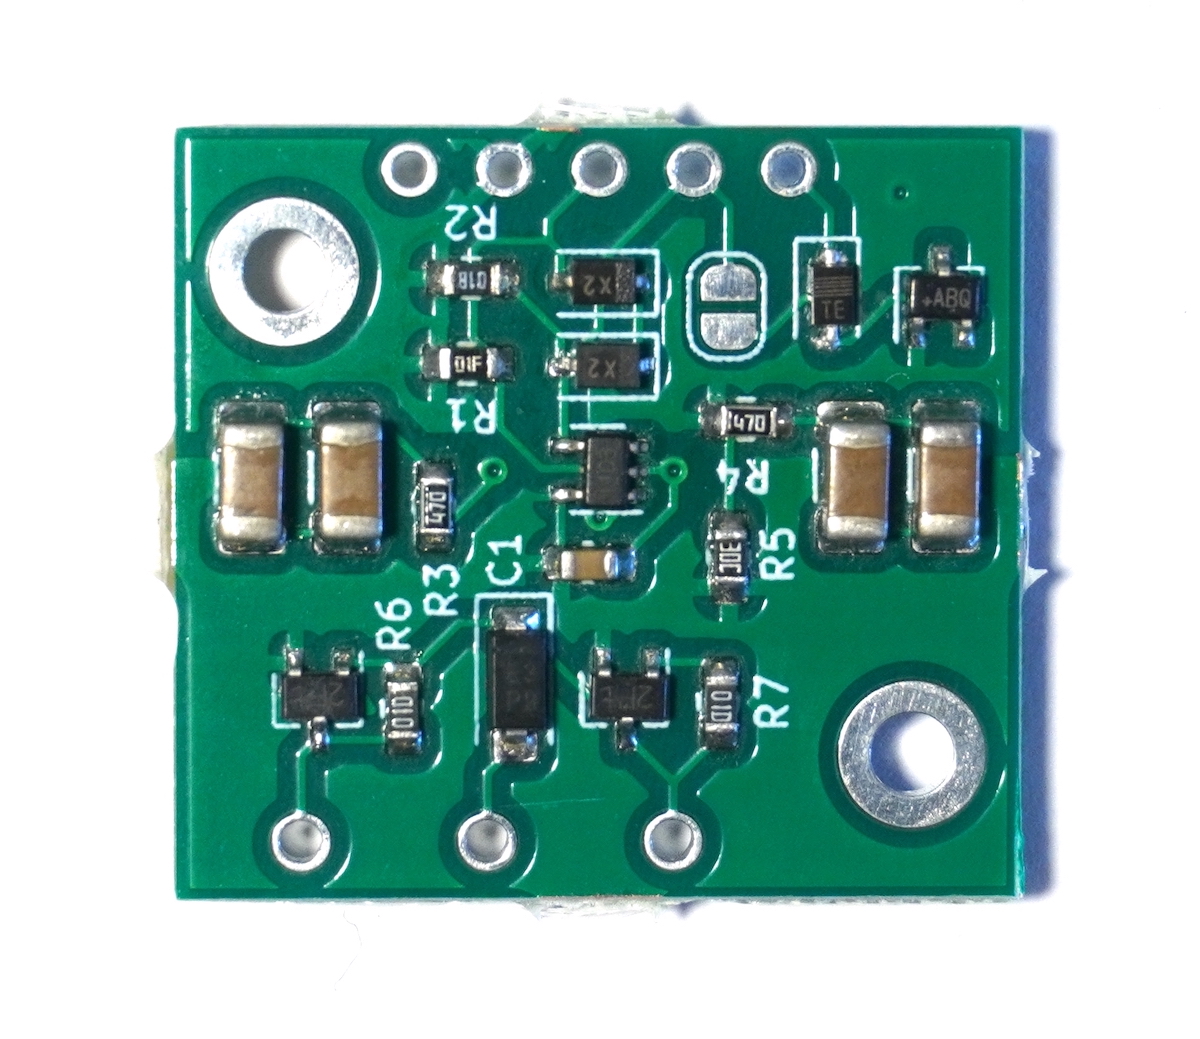
- GAIN Connect a resistor between the two GAIN pins to set the gain. Without a resistor, the gain will be unreasonably high and the audio will be very distorted. The gain is given by G = 1 + R/1000, where R is the resistance in Ohms of the resistor. Useful resistor values range from 0 Ohms to about 50k Ohms. A potentiometer in this range is included in the kit. Alternatively a chip resistor or solder bridge can be placed between the solder pads on the board to permanently fix the gain, in which case the GAIN pins should be left unconnected.
- GND To reduce hum, the piezo disc, preamp, and all cables should be enclosed in metal which should be grounded. This pin is provided as a convenience to help connect things to ground.
- SHIELD You should connect the outer braided shield part of an XLR (microphone) cable to this. The it can either be soldered directly to the pad, or the provided terminal block can be soldered to the pad and the cable can be connected that way.
- XLR 2 One of the inner conductors of an XLR (microphone) cable should be connected to this. It should be the conductor that is connected to pin 2 of the XLR connector you are using on the other end of the cable.
- XLR 3 The other inner conductor of an XLR (microphone) cable should be connected to this. It should be the conductor that is connected to pin 3 of the XLR connector you are using on the other end of the cable.
Shielding
To reduce hum, the board and piezo disc should be enclosed completely in metal, which should be grounded. The metal could be a metal box or aluminum foil. If using foil, isolate the disc by covering it in a layer of tape before covering it in foil, the disc itself should not contact ground. The 2 large holes on the sides of the board are ground and are meant to facilitate connecting the board ground to a metal box.
Housing
Jeff Ware designed a 3D-printed housing for this board which you can get here:
https://cults3d.com/en/3d-model/tool/case-for-metal-marshmallow-diy-phantom-contact-mic
Accessories
To facilitate maximum flexibility, this kit does not come with XLR cable or audio connectors, since what you need for this will depend on what you are building. We separately sell
XLR Cable by the foot,
free hanging XLR conectors,
panel-mount XLR connectors and other
accessories that are meant to work in conjunction with this kit.
Watch on Youtube
This board is Phantom-Powered. There is a
Non Phantom Powered version here.